New Design – Foldover Bags
It has been a busy season in the studio. So many ideas and projects started. Now it is time to share one of them!

The idea for these bags was to have something taller and more narrow, that could also fold and be more compact. That way it can grow with your project.
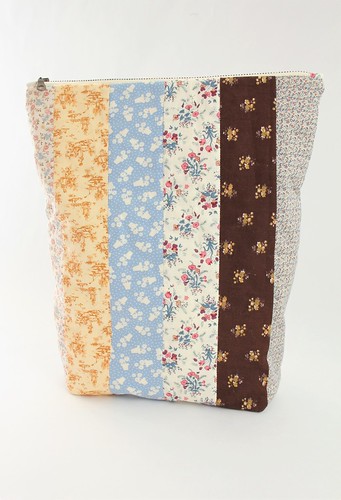
I am very into sepia tones these days – more to come on that – but this is the first product to reflect my new aesthetic obsession. Each bag has five prints on the front and one main print on the back. Every bag is just a little different, with variety on the back and the zipper color.

I also added an inner divided pocket, which is so handy for small notions.

There were many details to work out, but I am so happy with the final design. I plan to offer it in different prints later on, possibly a rainbow version!

My shop is at worksmith.etsy.com
Pop by and check out all my handmade items. Coasters sets are fully stocked with the largest color assortment I have ever offered.
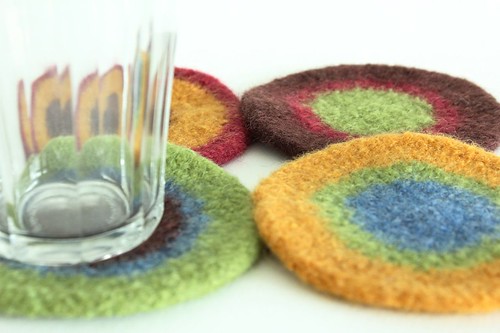
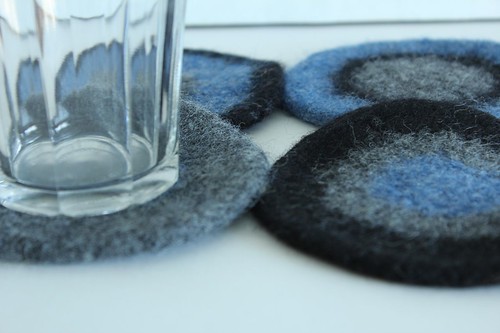
Felted Coasters
I am going back to a shop classic today. It all started with these coasters.
I needed something to do while my daughter was in dance class six hours a week. It was too far to drive home and then back to get her, so I needed to keep busy while I waited.
So I decided to take up knitting again. I had knit a sweater in college, but had absolutely no memory of how to do it! I got some books from the library and got to it. This was before YouTube was the vast resource it is now. Interesting note: I find that books for teaching kids knitting are usually the easiest to understand.
Anyway, I ran across a pattern for these coasters and decided to make them as gifts. Then friends started asking for custom colorways. So I decided to open an Etsy shop and if I sold a few here and there that would pay for my yarn. I got permission from the pattern designer to sell, and we were in business!
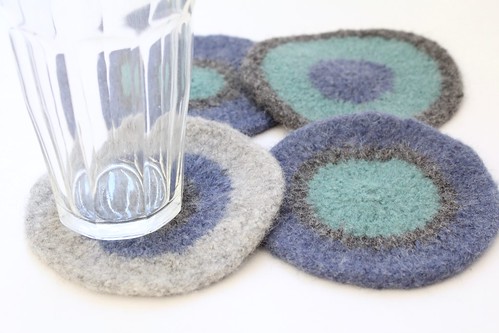
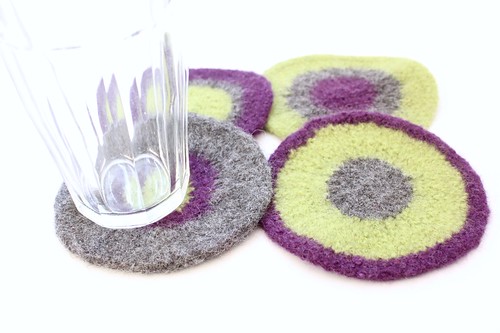
Each color is named after the woman that inspired it.
I have retired a few colors over the years and added some new… and somehow have never tired of making these.
Here are the currently colors in stock. There is free domestic shipping, which is always a plus!
Click this link to go to the shop.

Amy One
Amy Two

Laura

Christa Belle

Lauren

Wendy

Melanie
Rebecca
Violette
Hope you see something you like! Click here to be taken to the shop for more details!
Triangle Quilt

I had the idea for this quilt for a long time. It took me awhile to put together enough thrifted sheets in solid colors to make the perfect balance. I love playing with color and I would add one hue and then switch out another one or two. Then I would run out and shop some more for the color that I thought was missing.

I finally settled on six colors plus white. It is fun and bright, but just this side of “circus tent.”
Then there was the decision of how to quilt it. I did a small quilting sample and decided to invest the time in the diagonal diamond pattern. I am so glad that I did! The texture brings a level of interest that makes it just a little more sophisticated.
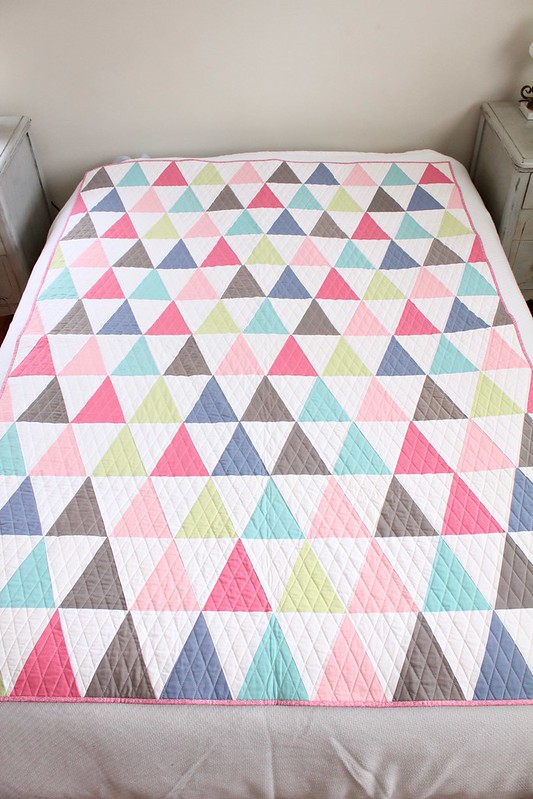
I hope you love it, too! I was fun to make and I just might have to do another – after I finish the other two quilts I already have in the works!

For more specific details, click here to go to my Etsy store to view the listing. Hope you have a special quilt to keep you warm this winter!

Yarn Along – 11/7/18
Joining Ginny today in her Yarn Along where we share what we are knitting and reading.
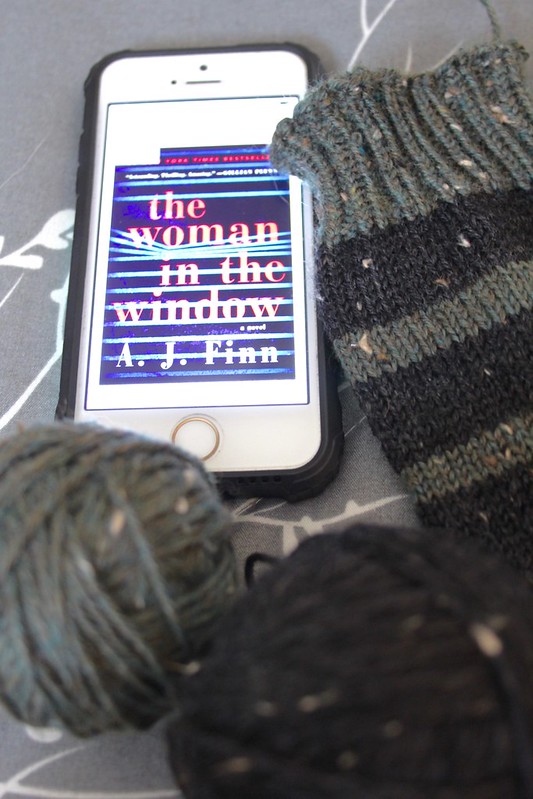
Currently working on a sock design and it has been really fun! I don’t want to share too much because I think I might release it as a pattern. Above is a little peek.
Black socks are always fashionable, but not great for knitting at night, so this is strictly a daytime project!
I am listening to a thriller, The Woman in the Window, by A. J. Finn. I had to take a little break because it is a little stressful, but it is oh so good! It is about a woman who suffers from agoraphobia who witnesses something from her window. It just dawned on me it is like a modern-day Rear Window, one of my favorite movies! No wonder I like it!
I hope I can get back to it after the stress of the election dies down. Only so much anxiety one can withstand at any given moment.
Hope you are reading and knitting up a storm. With the cooler weather I am knitting like crazy!
—————-
This post includes affiliate links. To learn more about our affiliate relationship please click on the “About” page below the header.
Grandmother’s Flower Garden Quilt
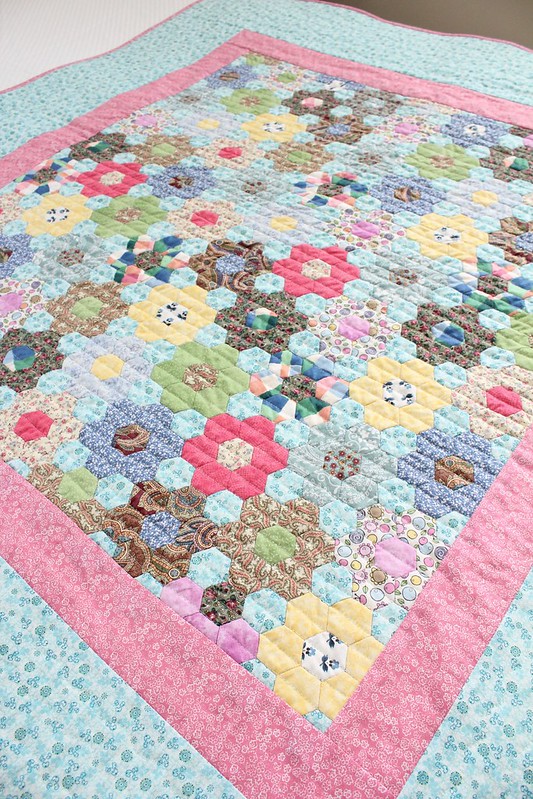
My current obsession: Hexagons.
I ran across instructions for English Paper Piecing on a blog many years ago. I decided to dip into my fabric scraps and start a project for our attic bedroom in our old house. We ended up moving before I finished the project and the color scheme didn’t work in our new home, but I loved the project and decided to finish it for my Etsy shop.

I am so happy with how it turned out! The hexagons are just over an inch each, which means it took quite a lot of time to hand-piece this. It is a very relaxing process and I recently started another, I enjoyed it so much!

This quilt is a throw-size, measuring 49 3/4” x 46 1/2”. It is a great layering piece for any size bed, or would look great on a sofa or porch swing.
The top was hand-pieced and then I added borders and binding by machine. I also machine quilted it with parallel lines for a nice texture.
For more information, check out this listing in my Etsy shop.
Favorite Homemade Health and Beauty Products
It started with a homemade liquid hand soap.
We go through quite a bit of the stuff in our household, so when I ran across a recipe for a homemade version I thought I would give it a try. It didn’t seem too complicated, and definitely made economic sense. The recipe I use starts with the base of one bar of Mrs. Meyers soap and makes about a gallon of liquid soap.
After that I started making various cleaning products to cut down on the harsh chemicals in our home. I do still use the occasional bleach product, but only for deep cleaning. The homemade versions work quite well for day-to-day upkeep.
I recently whipped up a few batches so I thought it would be a good time to share the tried and true favorites.
I will link to any of the ingredients I can find on Amazon.
HANDSOAP
First, for that hand soap. I use this in my kitchen and laundry room only, reserving the more expensive store-bought versions for our bathroom (which serves as a guest bath as well). Keeping up appearances, LOL!

Here is a link to a detailed tutorial.
I like using the Mrs. Meyers brand soap. It’s an inexpensive way to stretch the lovely scents and spend just pennies instead of buying the Mrs. Meyers liquid hand soap. You shred the bar soap, heat it with water and glycerine until it dissolves. Then it cools for 12 hours or so and becomes a liquid soap.

The soap formula is quite mild and the addition of the glycerine keeps it from being drying to the skin. It is not super foamy but more of a silky liquid. Note that as it sits in the storage bottle it will seem to have solidified. But I just give it a good shake and it loosens up for pouring.
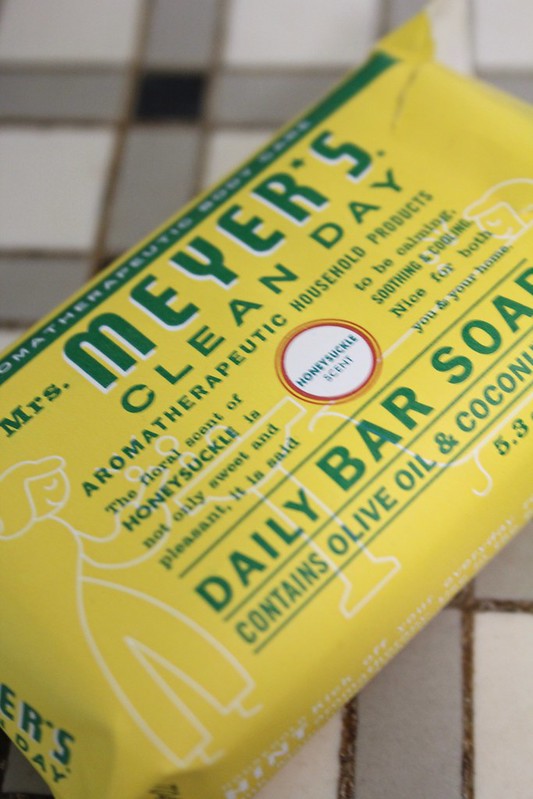
The honeysuckle scent is really nice, but I like the geranium and basil a lot, too.
MAGNESIUM OIL

This might seem an odd one. But I ran across this recipe when searching for options to get magnesium into my diet. I don’t tolerate it well in pill form, so I use a body spray. It seem you can absorb a decent amount subdermally. This has only two ingredients and takes minutes to make a batch. Warning: If you are magnesium deficient, you will get a mild burning sensation when you apply it. I found it to be very minor and faded as I built up the magnesium in my body.
I store the mixture in a large amber bottle, but I apply it with a small spray bottle. The smaller one has a finer mist that is easier to control and it good for travel as well.
Tip: Spray it on in the shower, but after you have dried off. It leaves an oily mess on the floor from any overspray. Using it in the shower will keep it contained! Then apply your body lotion a usual. This helps it to be absorbed faster.
Magnesium
Amber Bottle
Spray Bottle
CALMING ESSENTIAL OIL BLEND

I saw this recipe on Pinterest and made a batch for my daughter to help her focus and also to aid in falling asleep. I liked it so much I made myself a roller vial and keep it in my nightstand. I apply it to the bottoms of my feet when I am not sleeping well. It smells amazing! I find it works best if I don’t use it every night.
I have been buying my oils online from Bulk Apothecary. They are an Ohio company and the oils are a good quality (though not food grade) and they offer many organic options. The price is affordable and just right for me to be able to play around with scent mixing without breaking the bank.
If you find posts like this helpful, let me know in the comments below and I can share a few other homemade cleaning supplies I use around the house. Making them is kind of fun, like mixing potions!
—————————
This post includes affiliate links. To learn more about our affiliate relationship please click on the “About” page below the header.
Yarn Along – 10/3/18
So happy to be back joining in Ginny’s Yarn Along! It’s been too long!

I have a new project on the needles. I was craving a light, linen, lacy shawl to work on… so I poured over some stitch dictionaries and came up with a lace pattern I really like!
I settled on Quince and Co. Lark in the color Moon. It is a lovely fingering weight linen that washes up so soft and flowy!
As for reading, I have started a book for a neighborhood faith-based women’s group I have recently joined. Looking forward to building relationships with some new ladies and growing together. Our first book is Girl, Wash Your Face, by Rachel Hollis. It is nonfiction and dives into the lies we believe about ourselves. This topic never gets old for me. Only a few chapters in, but Rachel seems authentic and relatable.
Hope you are enjoying a knitting project, a new book, or both this fall season!
—————————
This post includes affiliate links. To learn more about our affiliate relationship please click on the “About” page below the header.
Embroidered Heart Sachets
Just in time for Valentine’s Day at Worksmith.etsy.com…

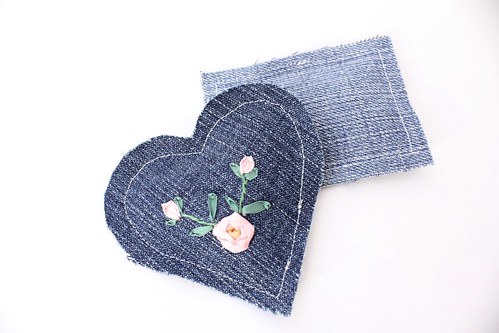
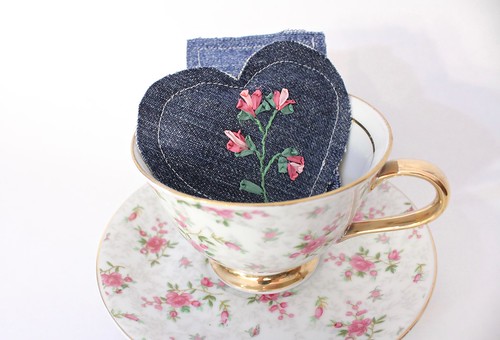
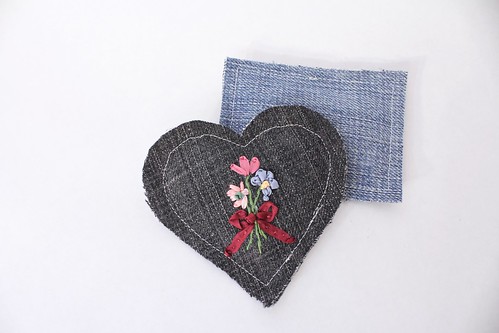
I put together some darling sets of lavender sachets. Each set has one rectangular sachet and one heart-shaped embroidered sachet. It was fun to pull out my ribbon embroidery supplies again! The perfect thing to tuck in a drawer, suitcase, knitting bag or even your yarn stash. They smell divine!

Pop by the shop and check them out!
Free Shipping Special

Great news! I am offering FREE SHIPPING on everything in my entire shop! So if you have had your eye on something, now is the time!
Felted Coasters

Felted Bowls

Liberty of London / Upcycled Denim Zipper Bag
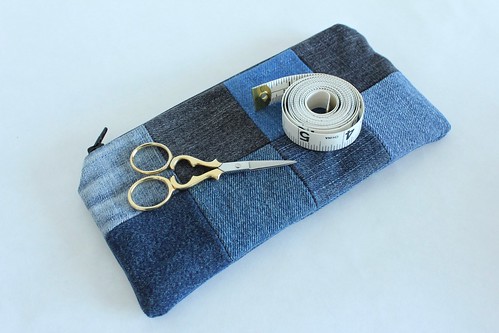
Upcycled Denim Zipper Pouch
Sale INCLUDES quilts! Shipping on these range from $15 – $20, so it is a significant savings on these heavy items.
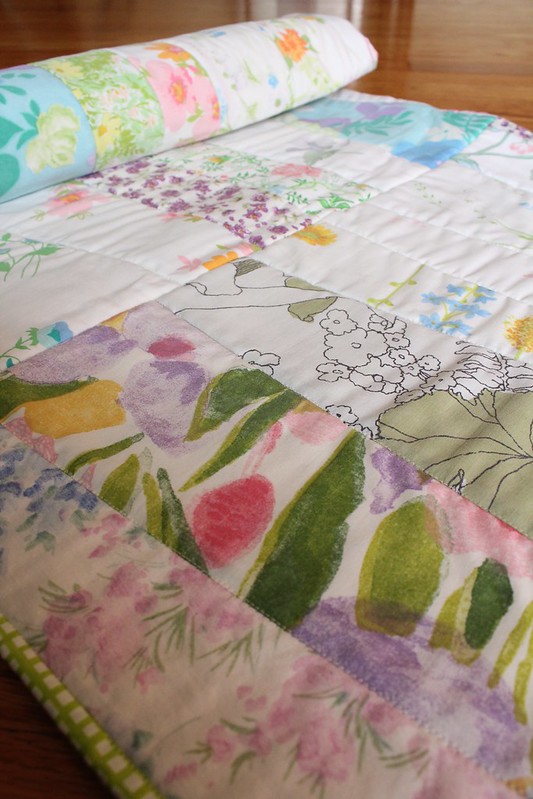
Vintage Sheet Throw Quilt

Twin Size Upcycled Denim Quilt
So kick off the holiday gift season and stop by for a peak. Happy shopping! You can find my shop HERE.
Grid Paper Journals with Quilted Covers
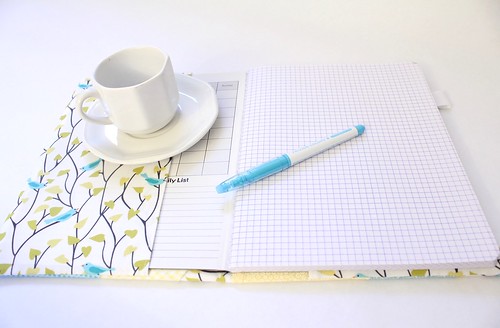
I have been wanting to put together my own design for these journal covers for so long! Finally got it worked out and I am so happy! Check them out in my shop here.
Look at all the fun styles and colors!
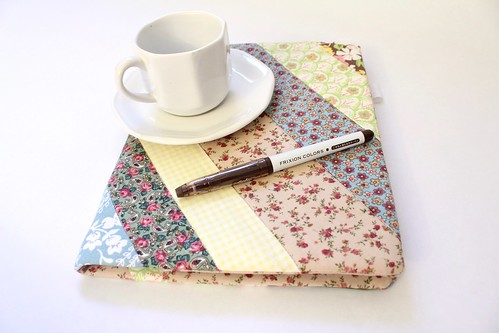

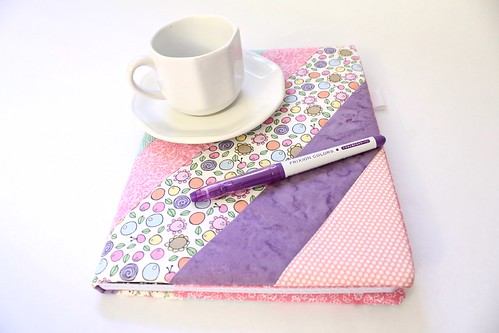
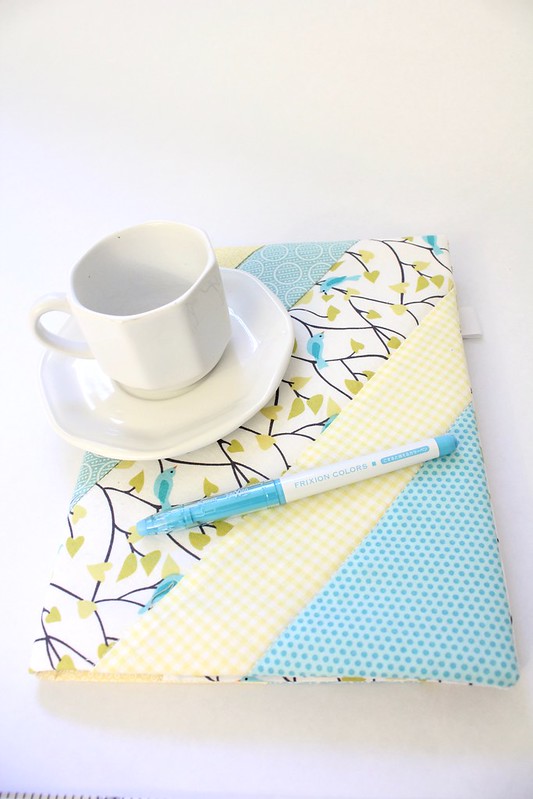


Each one comes complete with a grid paper composition-style notebook which can be replaced when the pages are filled. Just slip in a fresh notebook and you are good to go! These would work great not only as a journal but also as a sketchbook or for taking notes.

Hope I am not the only notebook crazy person out there! Totally using one of these for my design sketchbook.
